
TRAVEL TRAILER WALK-THROUGH
EXTERIOR CONNECTIONS
(ONCE TRAILER IS PARKED AND LEVEL)
- Hot Water Tank and City Connection
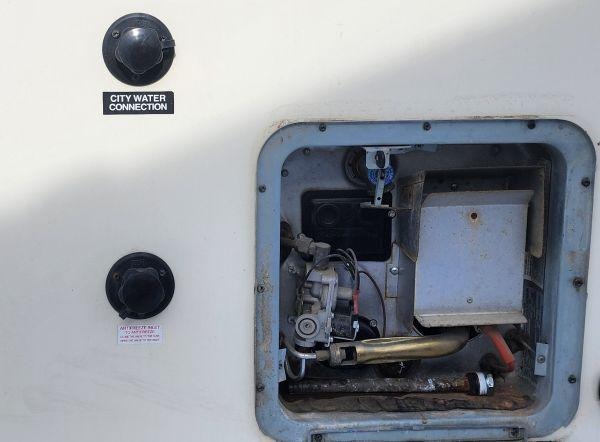
Seen above is a photo of the City Water connection and the Hot Water Tank (will be found by opening the panel in front.) The hot water tank will have a plug that will have been removed when the trailer has been winterized (We will cover the winterization and de-winterization later in the manual). City Water refers to pressurized water that you will get from your campsite; it is the same as any external taps on your house. Connecting a garden hose to this connector will provide water under pressure to your trailer. Also seen in this photo is an external connection for anti-freeze for winterizing your trailer, you should note that not all trailers are equipped with this feature.
- Sewage Connection and Drains
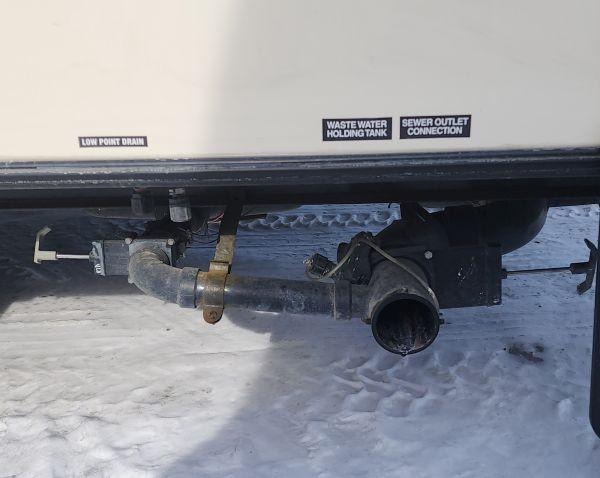
This photo shows the low point drains, the handles for the Grey and Black water tanks and your connection for a sewage hose. If your campsite has a sewage hookup, connect the sewer line to your camper and place the other end at your campsites sewer. Open the Grey (Shower, sink) tank valve and the Black (Solid waste from bathroom) and you will not need to use your holding tanks. If you do not have services at your site, keep these valves closed, when done camping, most places with have a dump station where you can connect your sewer line to, open the valves and dump your tanks before you return home. You can also open the low point drains to remove any water in the system to make for a lighter load.
- Filling your Potable Water Tank
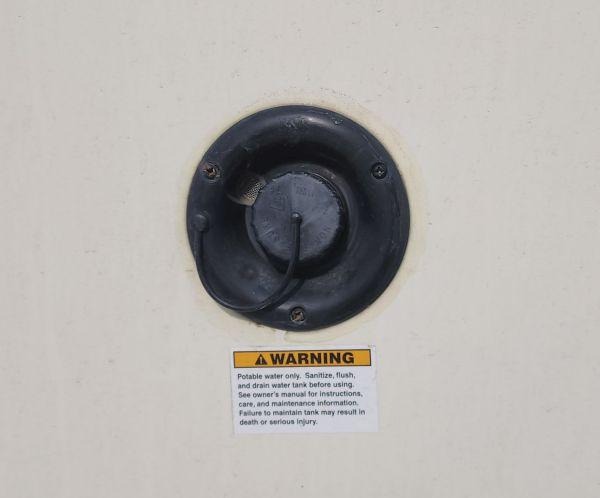
If you are going camping somewhere without a water source that you can connect your trailer to, your trailer is equipped with a fresh water tank that can be filled before you leave on your trip. To save weight, I would check with your campsite to see if they have a place to connect your trailer to in order to fill your tanks when you get there. Simply make sure your low point drains, as seen in the previous photo, are closed. Connect a garden hose to a water supply and fill your holding tank, trailers are equipped with a pump that will give you pressure as the tank itself is not pressurized, simply turn on the switch inside and your pump will give pressure when needed. Nothing is going to go wrong with your water pump if you leave it on, but leaving it on allows for the possibility of problems like leaks, floods, and drained batteries
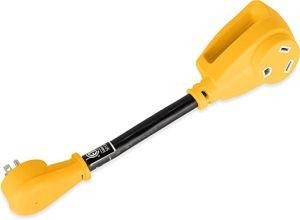
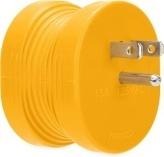
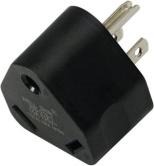
- Power
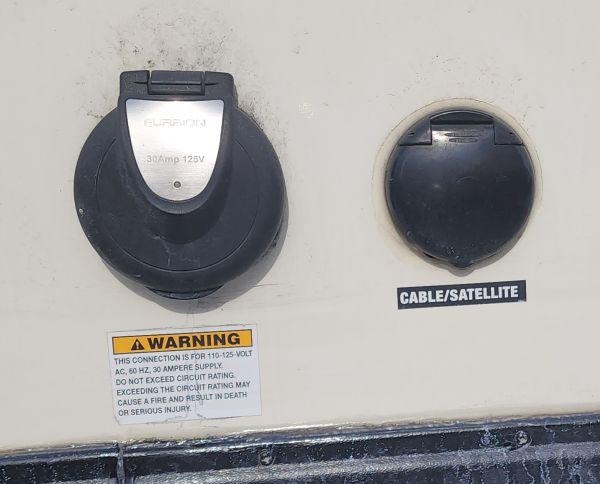
Travel Trailers are equipped with a standard 30Amp service panel, some campsites offer 15A or 30A service. If you are at a campsite that has a 30Amp service, simply connect your power cable from your trailer to the supplied power, if it a 15A service you will need to use a 30A to 15A adapter to step down the connection. A 15Amp service will look the same as your home outlets. Here are a few different styles of adapter.
HOW TO WINTERIZE / DE-WINTERIZE YOUR TRAILER
In this section we will go through the process of winterizing your trailer at the end of the season and de-winterizing it to get it ready for camping.
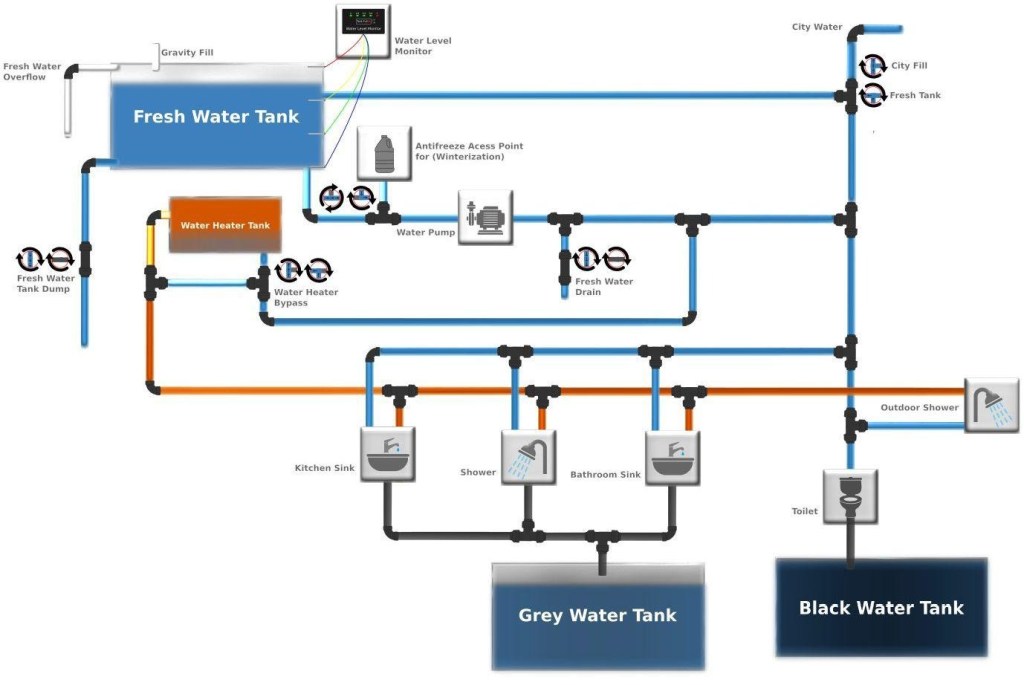
RV WATER PLUMBING DIAGRAM:
De-Winterization
Your trailer will have anti-freeze in the lines from either being stored at the dealership where it was purchased or your storage facility. Below are the steps for getting your trailer ready for the camping season.
Step 1
Connect your garden hose to the Potable Water connection as seen in the previous section and fill your tank about ½ ways. The indicator panel inside will show you your level.
Step 2
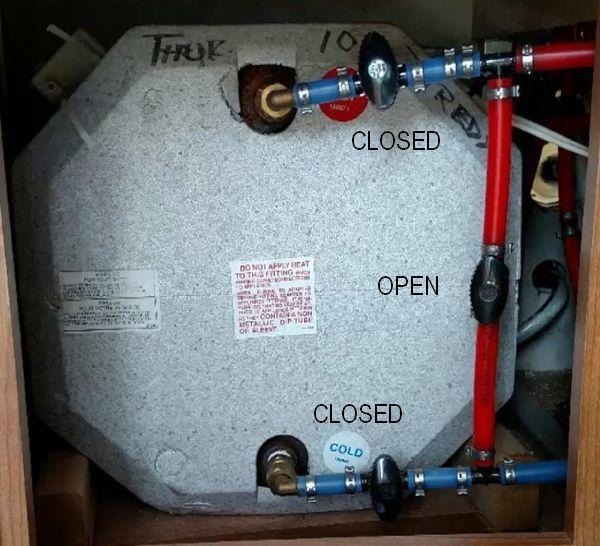
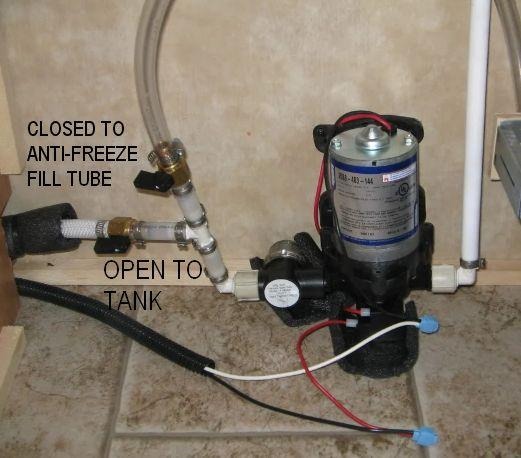
Make sure the valves on the water pump are taken off the winterization cycle that allows for anti-freeze to be inserted into the water lines and the hot water tank is in bypass as seen in the photos below.


You can see the tank is still in bypass mode while the valves for the water pump are closed off to the winterization hose and opened to the fresh water fill (Potable Water Tank)
Step 3
Open the valve to the sink in the bathroom and turn on your water pump; you can also flush the toilet to help circulate the water. Once the water is running clear, repeat the process with the shower and kitchen sink, you can open these after liquid starts to come out of the bathroom sink, but opening them after the system is primed is recommended as it’s easier to build pressure with them closed. Don’t forget the outdoor shower as we want to get all the anti-freeze out of the lines in all the different water systems.
Step 4
Once the water is running clear you can turn off the pump and connect water to the city water connection as shown in the previous section, and when it is turned on it will flush the system an 2nd time.
Step 5
Once everything is done you can turn the water off and open the valves to the hot water tank and take it out of bypass by closing the valve between the 2 lines. Place the plug into the hot water tank from by accessing it from the outside panel. Your water system is now ready to go. To finish getting ready, install the battery and propane tanks, check your tires and safety equipment like CO and smoke detectors and that your fire extinguisher is fully charged.
Winterization
When you are ready to store your trailer here is the process to follow in order to get it ready for winter.
Step 1
Open all the drains on the outside of your camper as seen in the first section of this manual and open the pressure release valve on your hot water tank. Once your tank has drained, remove the plug from your hot water tank, make sure your black and grey water tanks are empty and flushed if possible. Close the low point drain and turn on your water pump, with a pail in the sink, turn on open your faucet to get any more water out of the system.
Step 2
Put the hot water tank back into bypass as seen below, close the valve on the water pump that leads to the tank and open the one to the anti-freeze fill tube. Your hot water tank should look like the photo below and your pump should have the valves opposite as shown.
Step 3
Place the Anti-Freeze tube in a bottle of RV antifreeze (food safe / pink), you will need about 16 liters to fully winterize your trailer. Open your low point drains, turn on the water pump and check for antifreeze to be coming out your drains. Close the low point drains and turn off your water pump.
Step 4
Turn the water pump on and one at a time open the faucets at the sinks to verify anti-freeze is flowing, you are going to want to check both hot and cold lines in the kitchen, bathroom and shower faucets. Flush the toilet until the water is pink, leave some of the antifreeze in the bowl to keep the drain valve from drying out over the winter.
Step 5
Once you have antifreeze running through the entire system, slowly lift the siphon hose out to get the rest of the antifreeze out of the line, close the valve to the siphon tube when empty and turn off the pump. With the water lines ready for winter, flush the grey and black water tanks, some trailers will have a black tank flush connection that you can connect a garden hose to in order to make this easier. If there is no black tank flush port on your trailer simply insert a dedicated hose into the toilet and run water into your black tank and drain the tank. Pull the batteries and propane tanks from the trailer, you can use a small charger to maintain the batteries over the winter so they are ready for your next trip.
There are many useful videos and information online that can walk you through all these processes step by step, if you have any questions please feel free to contact us via the form on the website and we can try to help you over the phone.
Congratulations on your trailer and happy camping!!
